Saturday, 11 May 2013

10. 1 black magic DIY series goth ninja part 1: hooded infinity fringe scarf

before I get into the actual blog post content, I'd like to say that I am an idiot that managed to delete all the comments on my blog


.So if you wondering why  I didn't reply AND deleted your comment ...

or.. if you were wondering if I  had a " holier than thou" outlook on life....
 where I look down upon thy miniscule readers and sneered as I erased all evidence of contact with my heavenly being.


nope
I was just being a immaculate example of stupidity.

that is why.


anyways, I digress

its my 10th post 

In crazy girlfriend terms,  the 10th post equals the one week anniversary

and to celebrate I'm starting a  series using this giant piece of black fabric


In this series of DIYs, I'm going to take this piece of fabric and magically turn all of it into wearable(uhhh okay, well we could debate a bit about the definition of wearable ) pieces of clothing/accessories

hence the title...
black magic! (I'm so lame)
 Your parents taught you to not waste your food, I'm telling you to not waste your fabric. 

First DIY is for all the men out there..
if there is any reading my blog

I can almost hear a cricket

anyways.

this is going to be a DIY Goth Ninja Hooded Scarf (which by the way sounds a lot cooler than a snood)
inspired by  Deep style hooded fringe top with hood


you can find their stuff here on their official site  or on yesstyle if you just want skip everything and just buy it

and here is my DIY black hooded scarf


For all you people who have no clue what style a goth ninja is,
just imagine it.
its exactly what it seems
page from F*** Yeah Mens wear


I personally love this style.
its like Death eater chic

some key points to this style are
1. monochromatic colors such as black, black, black and shades of black (grey),
2.  the bigger the hood and the more layers, the higher the level
3. Rick Owens
3.5  drape.

Now, for the DIY, you'll have to sew a bit. but it shouldn't be a big deal for beginners. (I managed right? )

you will obviously need some black fabric (preferably jersey because it is light weight and you don't have to worry about the raw edges )

 fold your fabric in half with the insides of the fabric on the outside if your fabric has 2 different sides .


take something with a hood and draw a hood based on the size of that.
then extend your line to include fabric for the scarf part.

make sure the folded part is the bottom (if you want, you can also have the design with the folded part on the top if you don't want your scarf ends to touch )

pin it carefully

cut it while leaving about an inch for error and other things

sew  it all together and you should get this.

I cut some lines for the stringy effect.
and...as you can see it is totally hand sewable 


 now you could totally stop here but why not go to the extreme to use up all that fabric?

 I took some of the cut offs and cut them into strips then I braided it and sewed it on

I then  took another piece of the left overs  and sewed it on the inside of the scarf part.

remember to turn it right side out after sewing!


TADA


Wednesday, 8 May 2013

9. Make jeweled sunglasses

So the art of decoden isn't very new.
we have jeweled phone cases, cameras, mirrors and etc...

but now it seems that the new major thing to decorate is your sunglasses

From Dolce and Gabanna  to Disquared, to A-Morir
we have all kinds of embellished sunglasses

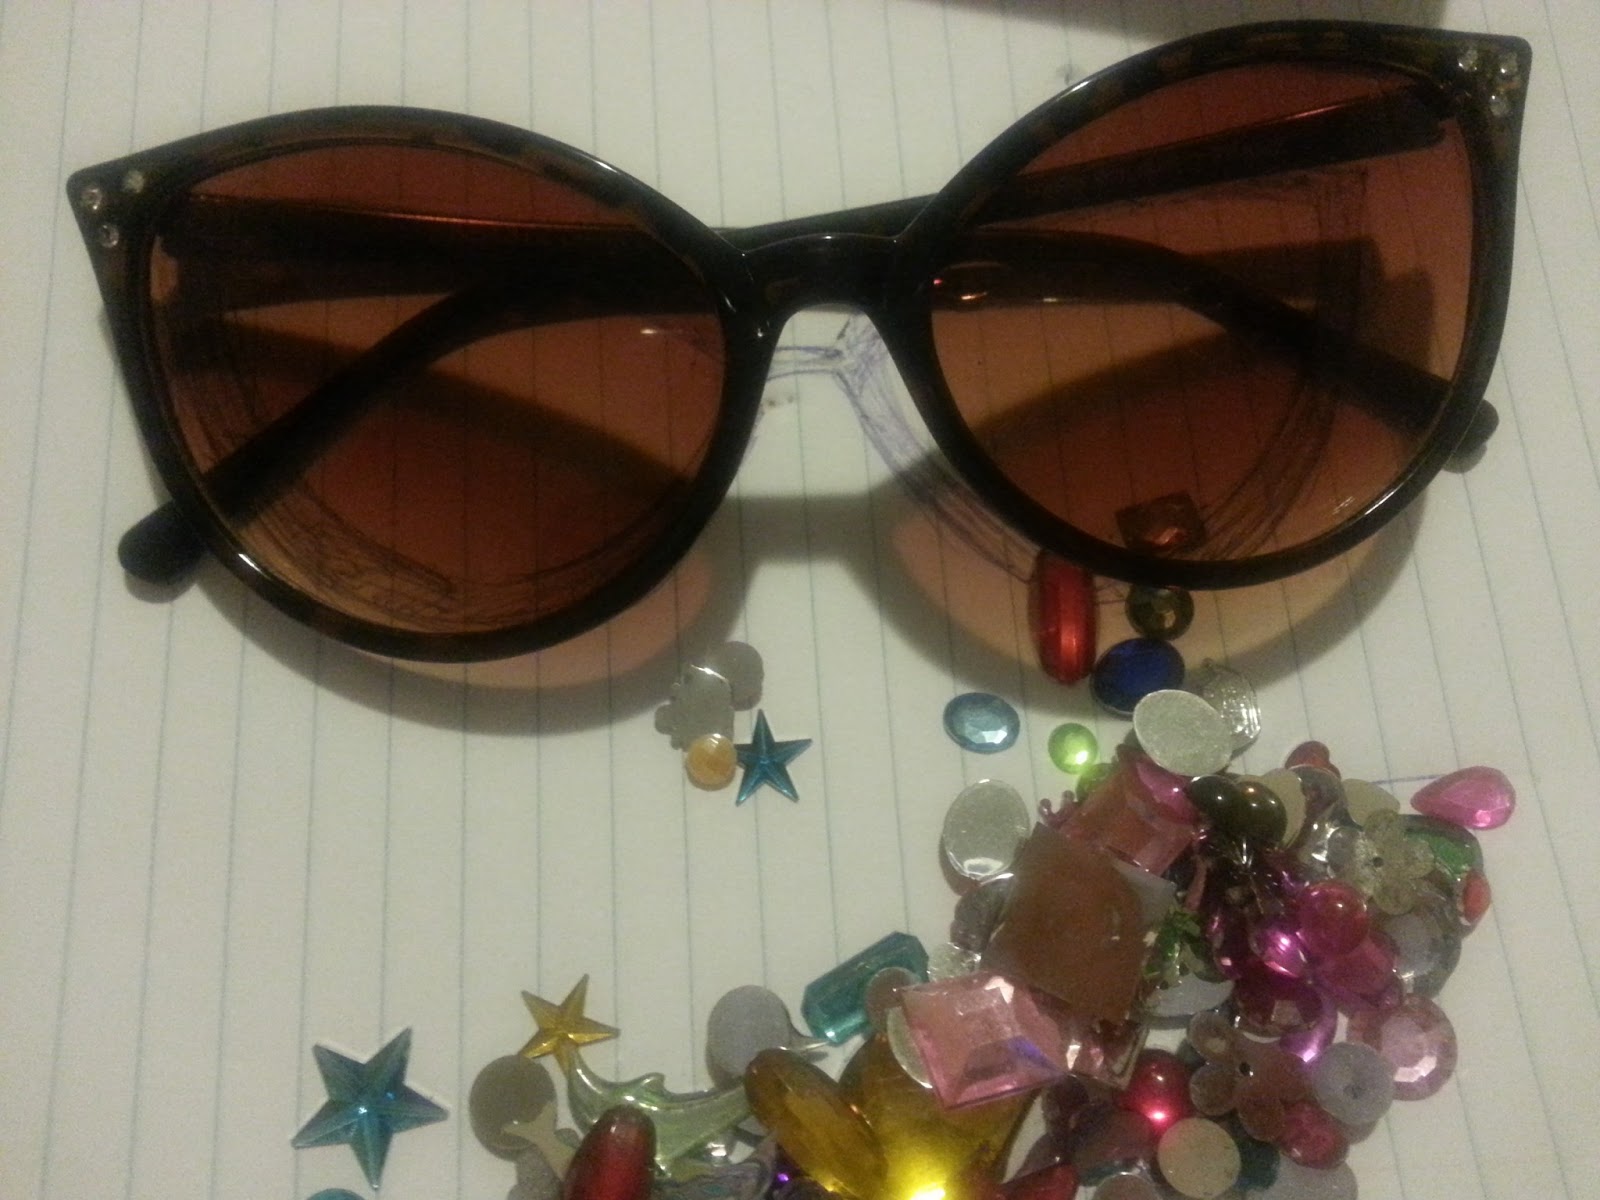
Today I am going to recreate this look 
and its so simple I could cry. (that is, if aliens had emotions)
So, you'll need some flat back rhinestones or anything flat that could adhere to your sunnies without much problem
You should be able to find some in your local craft or dollar store
 obviously you'll also need some sunglasses
I got the cat eye ones for a retro effect
 then plan out your design
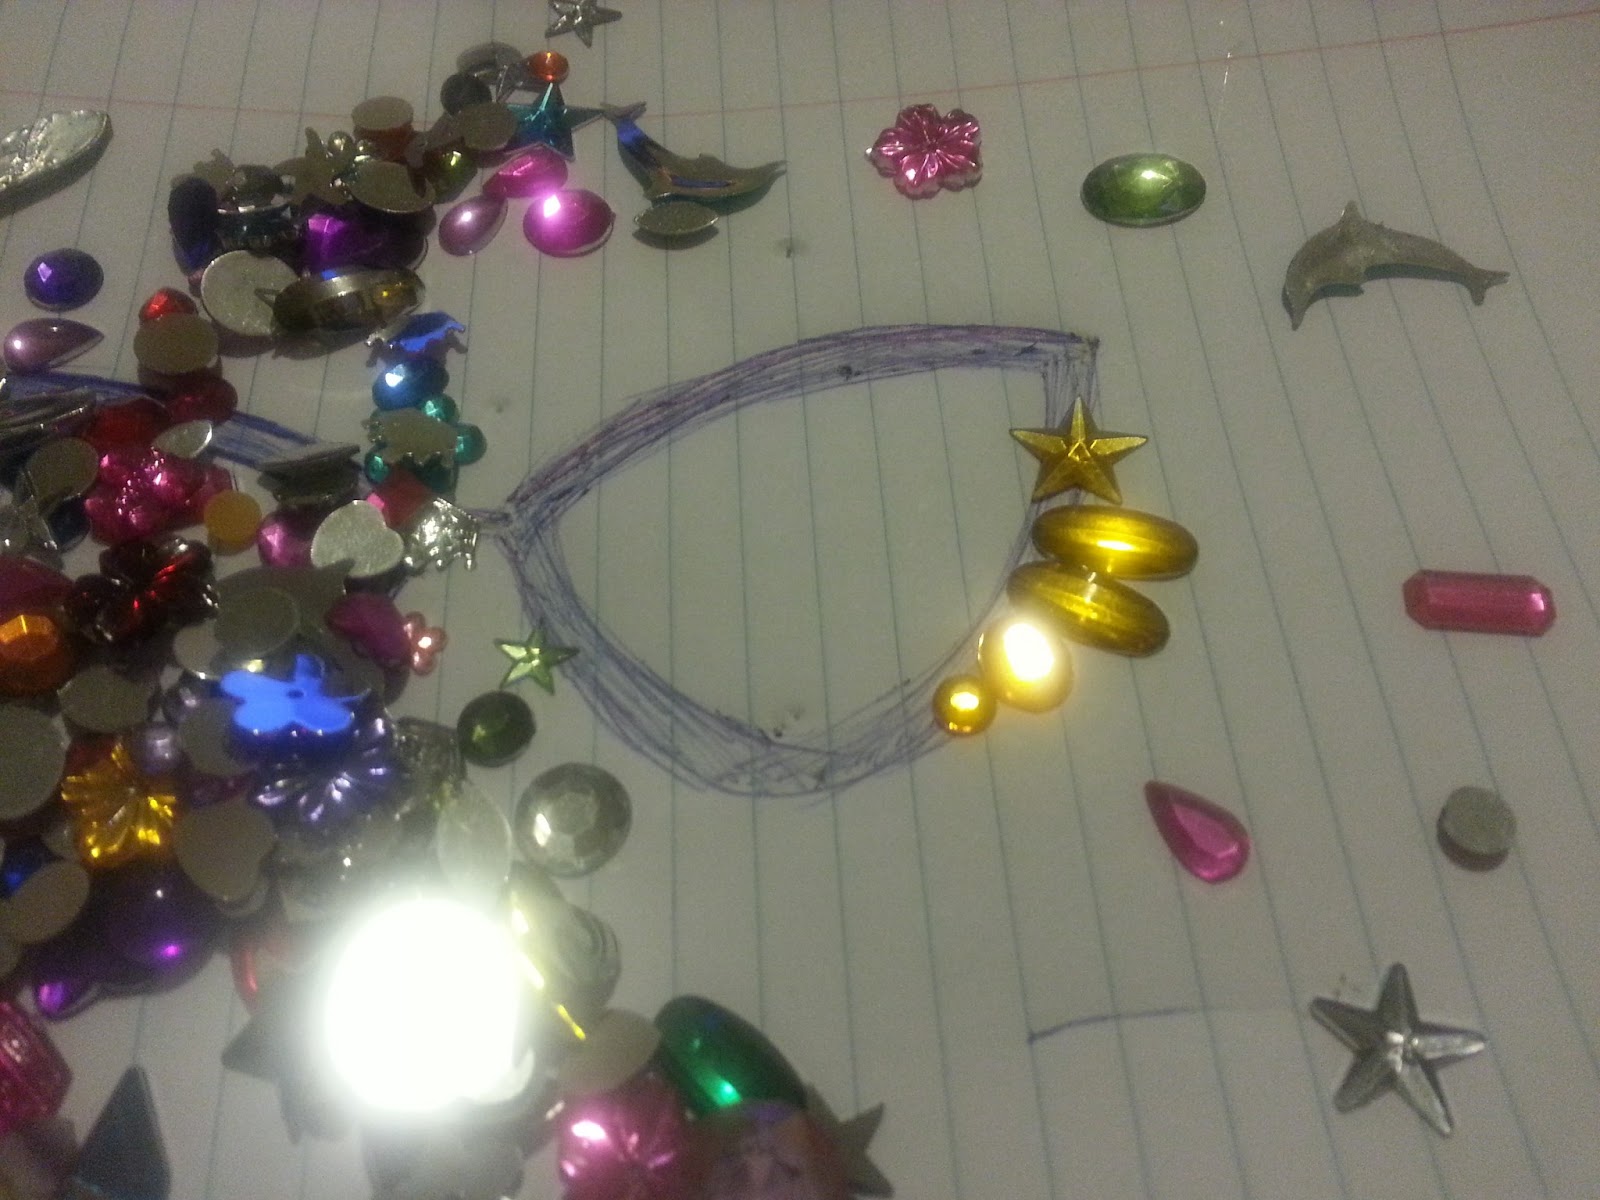
I like to draw myself a pair of 2D sunglasses to help me picture the design better in my head


Here are some design ideas


 Next, use some strong glue to stick your design onto your glasses

and...you're done 
this is the time where I take pictures of myself and pose 


Sunday, 5 May 2013

8. winged hairclips DIY

here's a quick and simple DIY on making little wings for nieces, daughters , or badass crime fighting unicorns in disguise.

I picked up some foam type paper from the dollar store for about 25 cents each
The yellow one I wanted to used for a different project .

So I drew my wing and all its separate parts onto the paper , cut them out and glued  them one some spare hairclips I had lying around somewhere. 


I made 2 different variations. One was more of a typical cartoon wing while the other one was inspired by cardcaptors (yes, I can not lie. I adore that show)


Here  is a picture of a super awesome crime fighting unicorn wearing these wings COUGHMECOUGH


Saturday, 4 May 2013

7. Customizing your new or old backpack with studs ,wings, and lions!

I went thrifting.
What's new?

I got this awesome bag which I thought that had some studding potential 

I decided to use both gold and silver studs of various sizes and styles. I also attached a pair of gold spray painted wings and a lion stud. 

the wing idea was  inspired by these adorable backpacks from  lost mannequin

 I think I quite like how mine came out . Not as adorable as the ones from lost mannequin but I am satisfied.


I bought and used gold and silver studs from ebay  
most of them are different sizer and shapes
I quite like how the different shapes look together. 

I used the same foam wing technique in my Jeremy Scott X Adidas wing tutorial to make the following wings 

I also had some random little lion studs lying around so I decided to attach them on my bag as well


Wednesday, 1 May 2013

6. Simple Midi/knuckle ring DIY

The midi , top knuckle, above knuckle, top finger, what ever trend is fairly new and from what I've seen not much retailers sell this yet


Midi rings are perfect for layering
this summer, instead of arm candy we should have finger candy!
(somehow that doesn't sound as pleasing...)

This is perfect for girls with small fingers that never can find rings their size.
you could tailor this ring to fit any part of your finger
its also quick, easy, and cheap.

what else could you ask for?


First, you'll need some pliers and really big jump rings

use the pliers to bend the jump ring to fit snugly on your finger 
I like the simplicity of the plain ones if I'm going to pair it with some other rings 
you can also use the pliers to bend your ring into different shapes and designs if you want to stack up some midi rings!
here, I made a simple V shape

You can totally add rhinestones, and charms to your rings
Here is a set I made by bending the jump rings and adding some rhinestones


I love how cute they can be
have fun guys!

Monday, 29 April 2013

5. DIY Rose flower snapback

This tutorial will show you how to make a floral snapback!


Its spring. Floral print is everywhere. Floral headbands are everywhere .

Everyone, their mother and their mother's dog has one.


 and there is nothing wrong with that! What girl doesn't like flowers? Isn't that why the boys always resort to them when they have no idea what to do?

For me , flower headbands are a bit too sweet and girly (bless the poor souls who would mistake me for being a sweet innocent little girl )
All I can see when I wear flower headbands is tiny tinkerbell-esque fairies dragging me off to some far off field then commanding me with their sugary sweet voices to a eternity of slavery for 1 oz of glitter per hour (that's what I've always imagined fairy currency to be)


So I decided to tone down the sweety girl image by combining roses with snapbacks.
( why not? besides, some of you people out there eat bacon with your ice cream.Surely this can't be as  outrageous ?)


First you will need:

Felt, glue and scissors
I chose a traditional red, grey, and a creme... because internally I'm a  conservative 70 year old cat lady

 it would also be super cute if you did a pastel or neon version

I suppose you could just BUY some flowers and glue them on your hat instead of making these flowers, but that would mean you would have to skip my entire post. (pout)


next,  you need to cut your petal shapes 
you can have as many or little rows you want. 
the more rows you have the larger the flower. 
you should have big and small petals 
make sure that if you are making a blooming flower,  to cut a little triangle out from each petal like below (you'll see why in the next picture)

I didn't cut the smallest row because I wanted the inner petals to be really close together (once again you'll see in different photo)

Glue each petal together from where you cut the tiny triangle so that they are curved to resemble a petal more 


you should end up with this  when you're done 
taking the smallest row with no triangles, just roll and glue it together like this. 

With your curved petal rows, starting from the smallest, roll them and glue together 

when you get to the end of a row, just take the next row and start gluing a new row from  place that you think that needs more petals 

you should end up  with this .
if you can see, the center has a really big space.
this is were the small roll of petals come in 

take the smallest row and glue it inside the bigger one 
this should be your finished results! 

now, munch on some food and make a whole bunch. 
then arrange it your liking..

the last step is to glue it on your snapback


and you're done 
(cue overload of  self photos)


and if you guys didn't know, my hair was inspired by GD's hair from his michigo MV
its just not fabulous as his.

remember you can totally do any sort of color, size, number of flowers your inner fairy desires! 
Have fun !